HaynesIntelligence
I wanted to play with GPUs for LLMs. My main goal was to have a local LLM integrated into Home Assistant so I could do my own thing without paying API fees or upcoming voice assistant subscriptions. I decided to do a Threadripper build with Dual 3090s.
Part List
Itemized
This one wasn’t going to be cheap…
| Item | Price | Quantity | Total | Note |
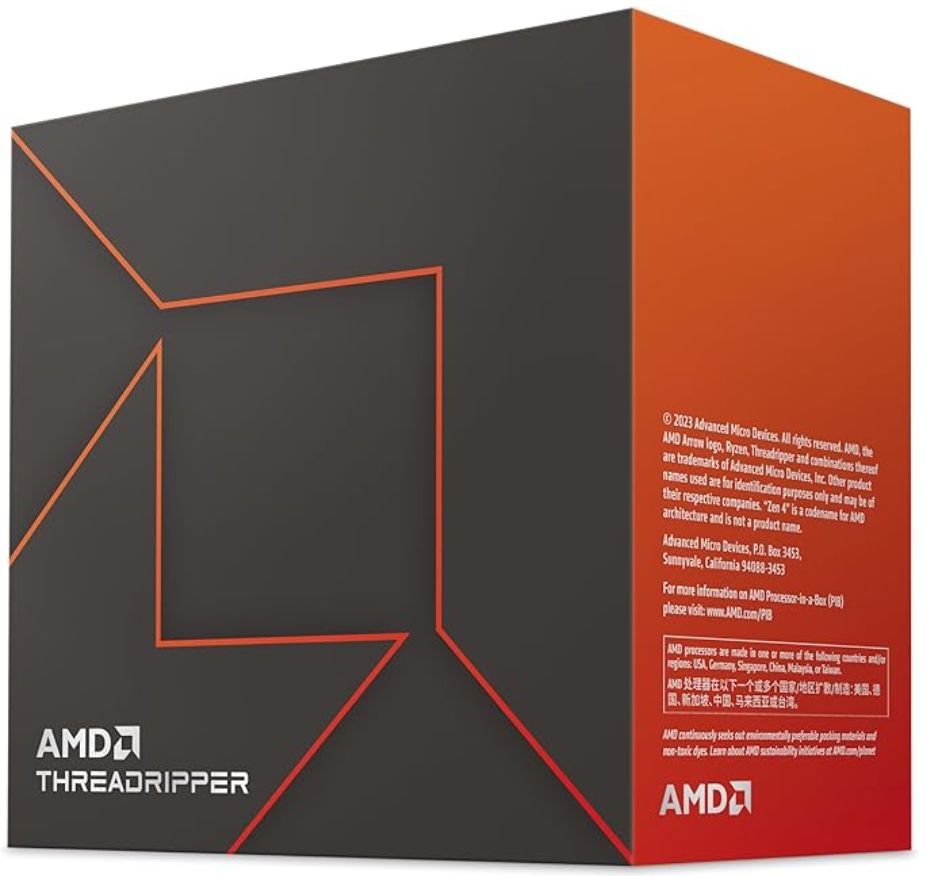
| AMD Ryzen™ Threadripper™ 7960X | $1400 | 1 | $1400 | Probably the lest expensive Threadripper I could find. |
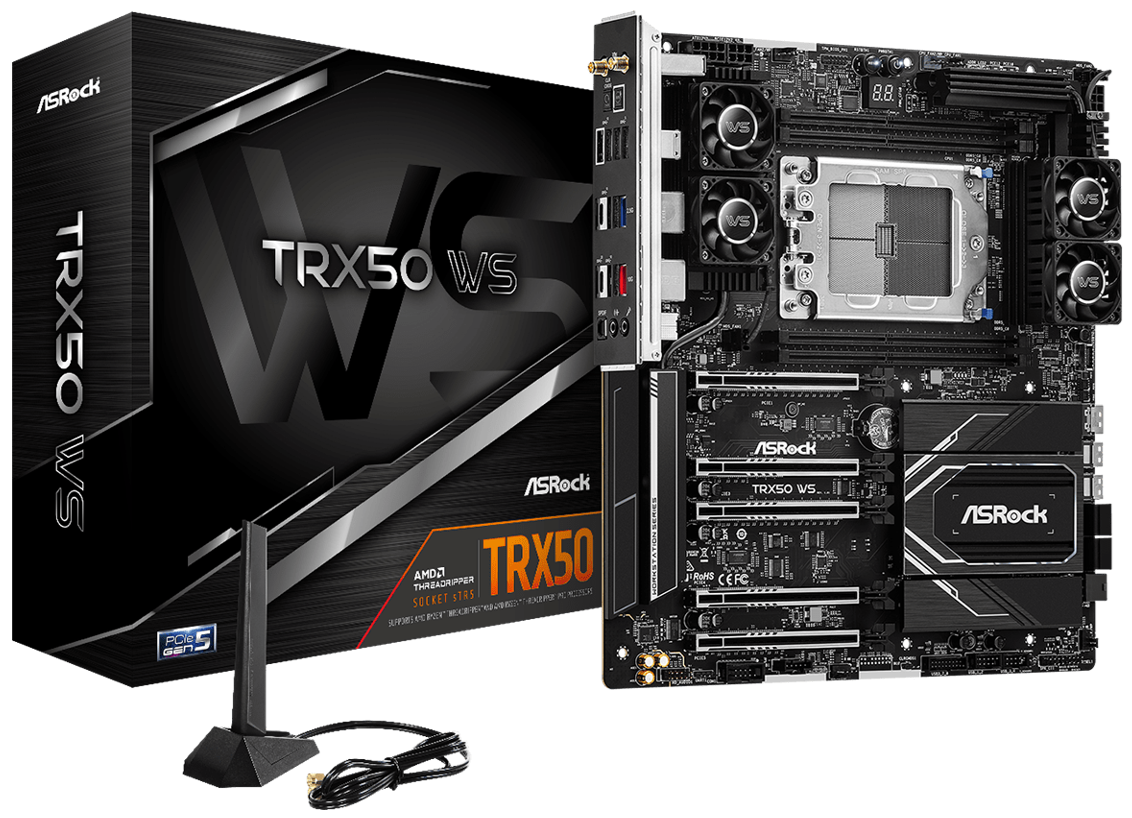
| ASRock TRX50 WS | $780 | 1 | $780 | Could support 3 GPUs + 10Gb NIC |
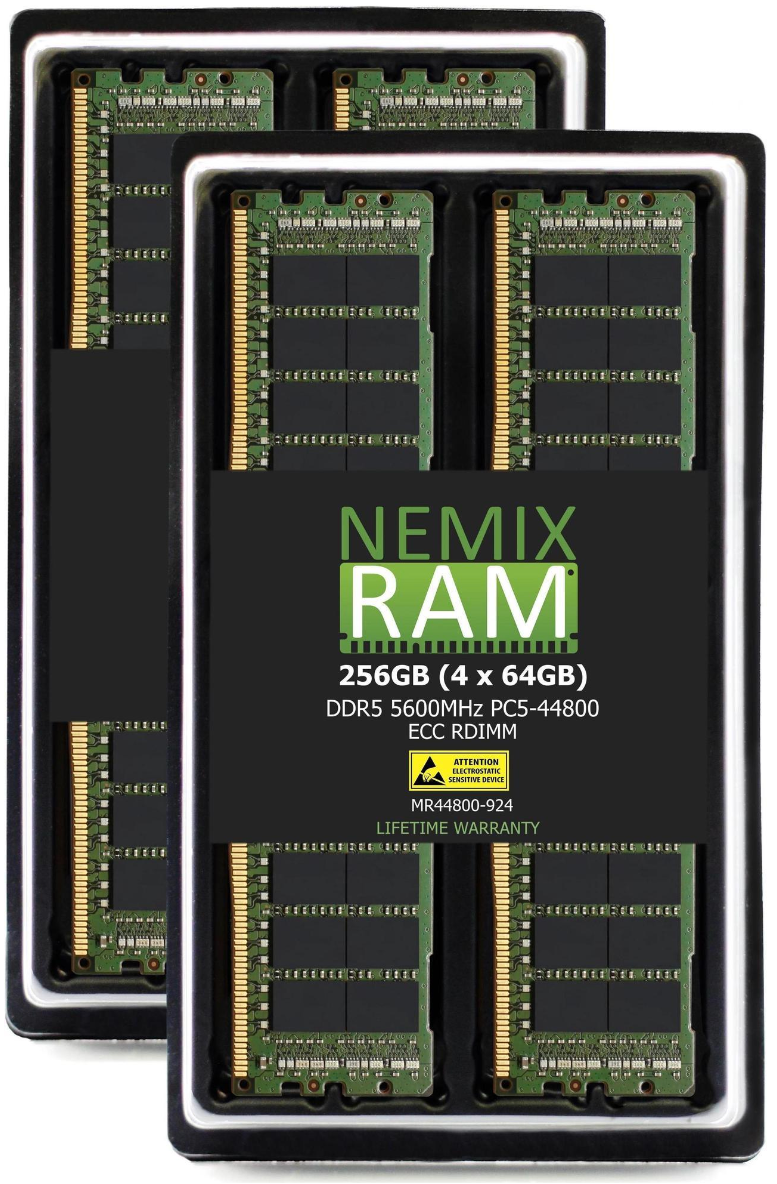
| NEMIX RAM 256GB | $1240 | 1 | $1240 | ECC may have been over kill but this was a proper server |
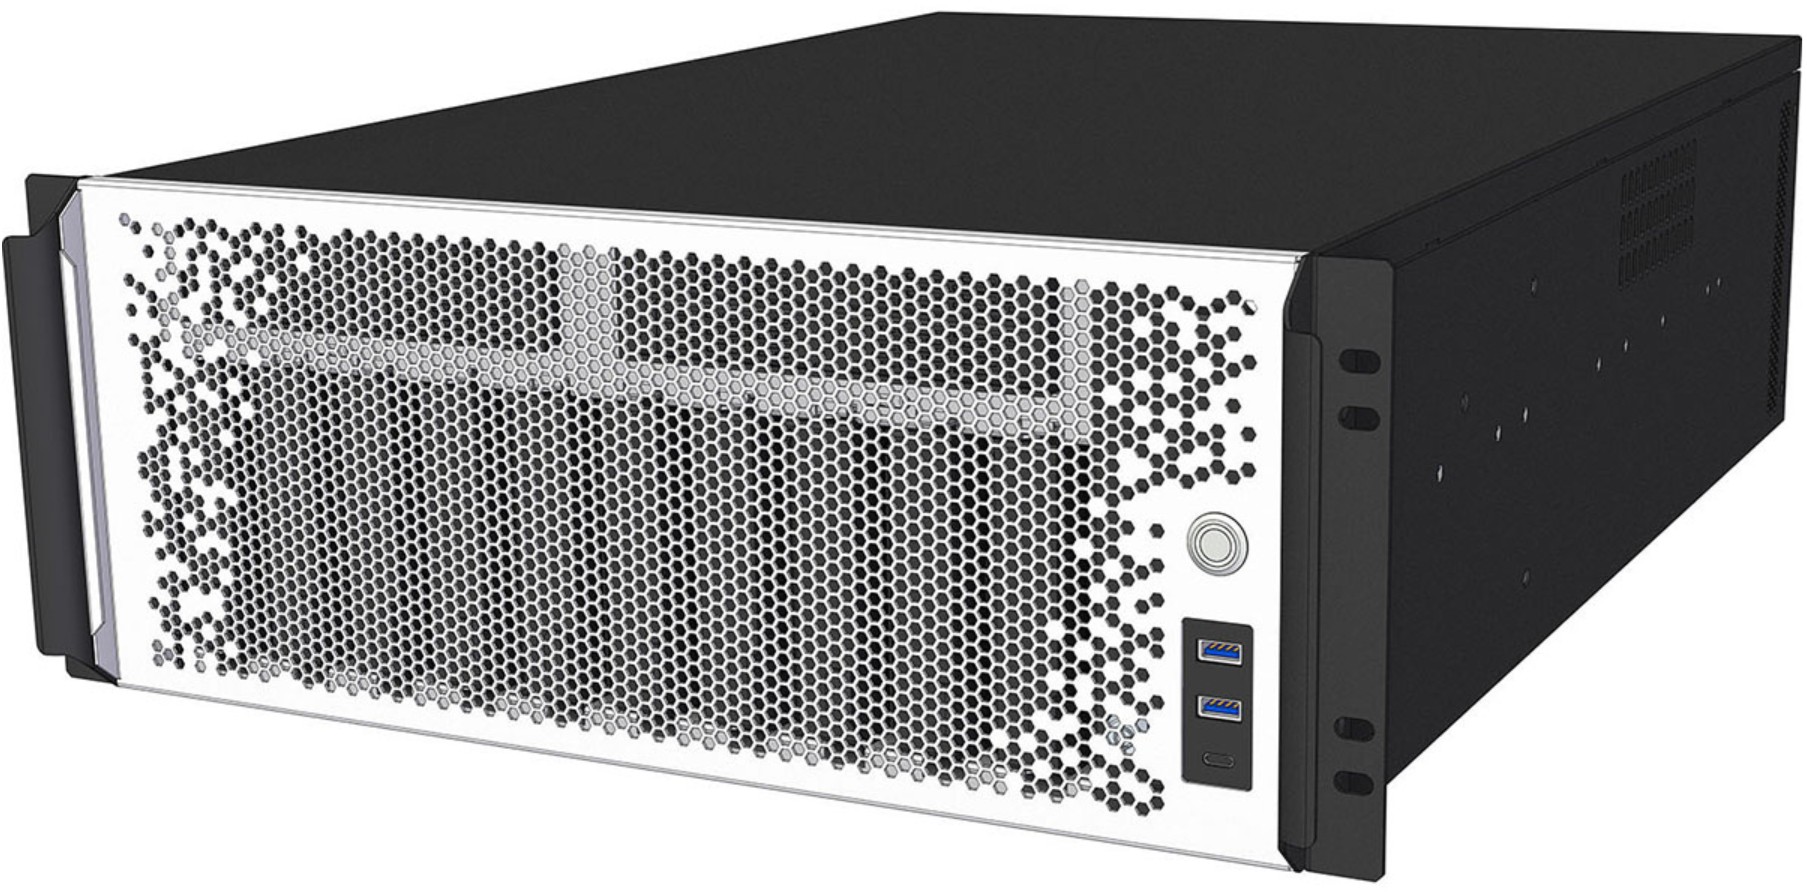
| CX4712 Sliger | $890 | 1 | $890 | I added cooling and rails |
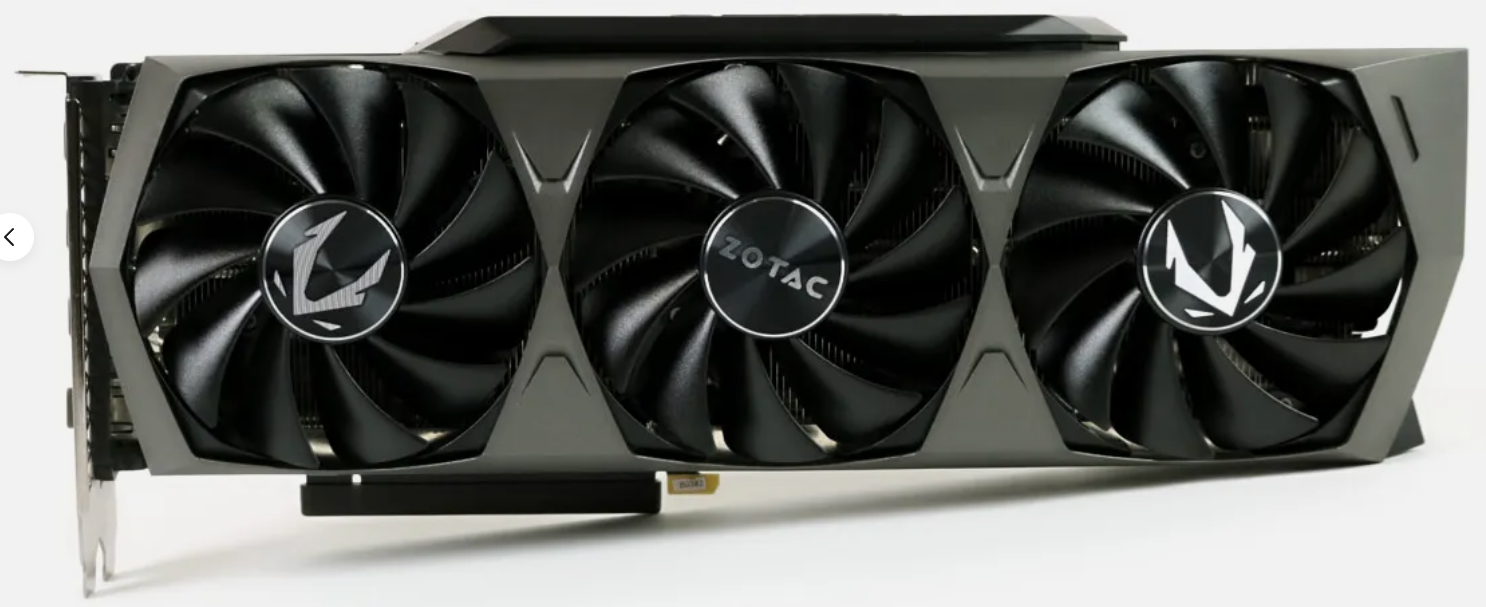
| Zotac GeForce RTX 3090 24GB Trinity OC | $810 | 2 | $1620 | eBAY specials |
| NVIDIA NVLink HB Bridge 4-Slot for 3090 SLI | $133 | 1 | $133 | eBAY, mixed reviews on if it helps w/ training |
| XFX Speedster SWFT319, Radeon™ RX 6800 | $370 | 1 | $370 | Had to throw this in to have a chance at hackintosh GPU passthrough |
| Seasonic Prime TX-1600 | $577 | 1 | $577 | My wall can’t handle this yet but the new house will have a 30A UPS |
| 3 Way 4 Pin PWM Fan Splitter | $9 | 2 | $18 | These 4U cases can be tricky with fans |
The case has 10 tray less 3.5” HDD bays plus a variety of other storage space so I also had some HDDs on the mind for a ZFS array. The TRX50 motherboard had two SFF-8654 4 plugs so I could easily rig up the 10 drives while still using. However, I wasn’t going to pull the trigger there until I saw it so I’d know cable length for power etc. I also still need 12 drives to fill HaynesTower but only six of those could add to the unRAID Array itself so it’s unlikely I’d get six others just for a smaller ZFS array.
Description
AMD Ryzen™ Threadripper™ 7960X
I needed a lot of PCIE lanes to run 3 GPUs, well maybe not for AI, but I didn’t want to be out of luck if I pivoted to gaming VMs after a failed attempt there. The Threadripper Pro’s had the most but got incredibly expensive. I grabbed a the 7960X from amazon which could get me where I needed without dropping fu money.
ASRock TRX50 WS
After looking at every Asus worksatation motherboard I could find and constantly being reminded that people now hate Asus I was pleased to find the TRX50 which I got from newegg. I’m excited that it not only can run the three GPUs but support plenty of HDDs for a future ZFS array via SlimSAS so no need to use a PCIE slot.
NEMIX RAM 256GB
Server memory is confusing and can get crazy expensive. I’ve never ran ECC before but I had the oppertunity here and I wanted this to be rock solid so, with some help from reddit, I picked up 256GB of NEMIX RAM on newegg. This RAM is pretty sketchy but the good stuff is crazy expensive. Maybe eBAY would have been a better bet but time will tell.
CX4712 Sliger
This case looks awsome and I am super excited to get it. However, it is taking a lot longer than the other parts but I believe it’s just from a small shop that does some custom or niche builds. I ordered right from Sliger seven days ago which means I’ve got three more before they recommend I inquire about the delay.
I also accessorized the shit out of it:
- Matte White because I like to stare at computers
- The rails since this would fit nicely on top of HaynesTower at the new house when I get the 42U rack.
- 6 Noctua fans for cheaper than what they sell for on Amazon
- Asetek 360mm which was an impulsive click but it’s a cooler guarenteed to fit in the 4U case which saves me some trouble sizing one
Zotac GeForce RTX 3090 24GB Trinity OC
Everything I read said VRAM was king for LLMs and the cheapest path to that was used 3090s. I found some ZOTAC ones on eBay that fit the bill.
NVIDIA NVLink HB Bridge 4-Slot for 3090 SLI
This wasn’t strictly necessary but I figured “why not” since I was already running two 3090s next to each other. Reading feedback online never really got to the bottom of if these helped but some seemed to think it sped up training. I don’t believe these are even manufactured anymore so it was another eBay special.

XFX Speedster SWFT319, Radeon™ RX 6800
My goal starting out was to stick three GPUs into one build. After seeing the price of the NVidia GPUs with 24GB VRAM I decided to go with two. I then got into a fight with a hackintosh and realized, since I was going to slice and dice the AI server w/ proxmox I could use the x8 PCIE slot for a hackintosh GPU. I picked up the much more affordable RX 6800 on amazon
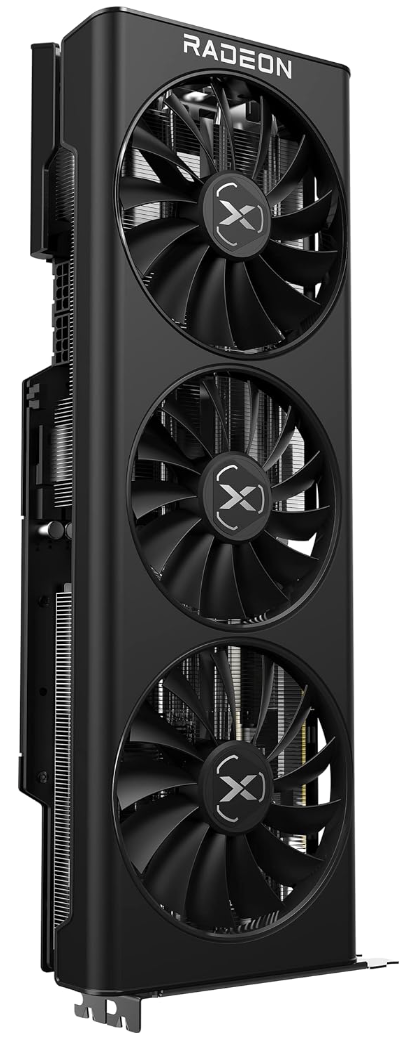
NOTE I didn’t use this in the server after all but rather popped it on top of an MS-01. However, the hackintosh was not liking the card, XFX needs some work apparently, so I just used it to play Fortza with a racing wheel in my basement.
Seasonic Prime TX-1600
Another reason not to have three beefy 3090s running under load is you may need two power supplies. Since the RX 6800 is not going to be topping out much a 1600W should do the trick for my needs. I grabbed the Seasonic Prime off Amazon.
Interestlingly I can only pull around 1440W from a 15A 120V breaker so this PSU may be able to blow a fuse. However, I will have a 30A 120V receptical and a 20A 120V receptical behind the server rack when I move in November which will be plenty of power for my needs.

The Build
? TODO Add build photos etc
OS
Proxmox With a Twist
The proxmox boot usb I’d been using refused to boot for this build. When googling the error it sounded driver related and it was recommended I use Debian 12 and install Proxmox on top. Proxmox has an official doc on how to get that done.
Raid 0 with Debian
There are half a million guides on this, like here I didn’t have much luck with them, probably because I had no idea what I was doing. They were also all for Raid 1 but here I’d prefer space to redundancy as I have plenty of redundent options and backups in place. I was thinking of this space more as the cache pool on HaynesTower (todo can link to cache pool info).
I ended up using the guided partition on one drive, then converting the largest partition it created to raid. Then I added a raid partition on the second drive. I then created an MD Raid 0 with both raid partitions and it seemed to work.
No local-lvm Storage on Proxmox
I can’t seem to use the partition Debian is installed on in Proxmox so I am circling back to make a smaller partition just for that and then split up the rest of the disk for Proxmox.
Pivot Back to Proxmox Baremetal
Just for kicks I made a new proxmox boot drive but we are still stuck on loading drivers…
BUT WAIT!
At the boot screen Install Proxmox should be selected/highlighted, press "e"

delete quiet "splash = silent" and replace with "nomodeset"
This got me in! Now for a Raid0 ZFS install!
Much easier to install on Raid0 for the NVMes than with Debian. Unifi is freaking out about duplicate IPs but I should be able to sort the networking stuff out after.
Networking, however, is being a nightmare but most likely partially UniFi nonsense.
First I tried to delete the old record in unifi from Debian but it just kept coming back. So I switched the IP and that got me further but the steps were learn as you go…
- First you just change it in the bridge
- Then
/etc/hostsneeds to match the IP - The kicker was
/etc/resolve.confwas wrong so I couldn’t resolve any hostnames
Join The Family
Time to join the cluster again (after booting the debian frankenmonster)! Hope the last one didn’t screw me.
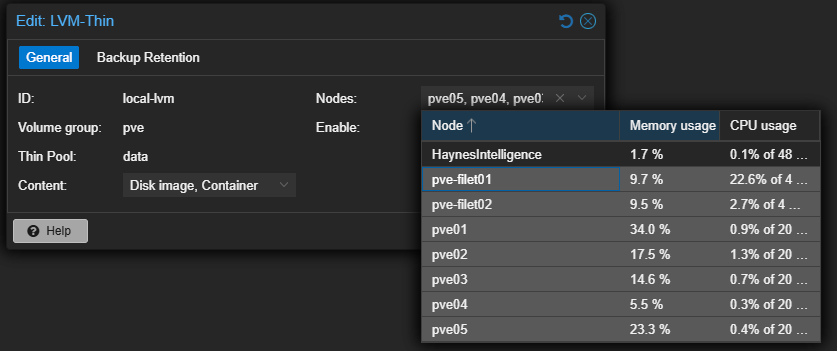
Now to not confused like I was before. This node has ZFS while everyone use uses a local lvm. I need to adjust for this in Datacenter -> Storage
First remove HaynesAI from local-lvm:
But now we need to get ZFS back. Go Datacenter -> Storage -> Add and configure:
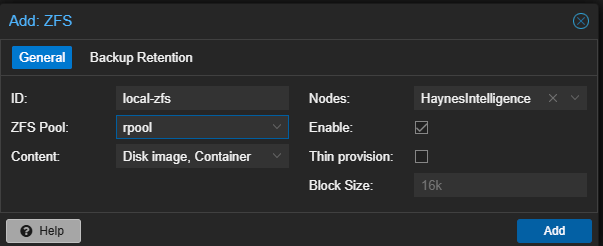
And storage looks great! I also installed Ceph to view those metrics but the storage devices looked fine without needing to do this.
GPU Passthrough
Whole point of this monster is the powerhouse of GPUs it punches. This guide had some risky clicks but is good in a pinch again.
Both GPUs are showing up in my devices and are ready to be configured:
root@HaynesIntelligence:~# lspci -v | grep NVIDIA
01:00.0 VGA compatible controller: NVIDIA Corporation GA102 [GeForce RTX 3090] (rev a1) (prog-if 00 [VGA controller])
01:00.1 Audio device: NVIDIA Corporation GA102 High Definition Audio Controller (rev a1)
41:00.0 VGA compatible controller: NVIDIA Corporation GA102 [GeForce RTX 3090] (rev a1) (prog-if 00 [VGA controller])
41:00.1 Audio device: NVIDIA Corporation GA102 High Definition Audio Controller (rev a1)
Then we need the vendor IDs:
lspci -n -s 01:00
01:00.0 0300: 10de:2204 (rev a1)
01:00.1 0403: 10de:1aef (rev a1)

lspci -n -s 41:00
41:00.0 0300: 10de:2204 (rev a1)
41:00.1 0403: 10de:1aef (rev a1)
Then we add them to vfio.conf (actually creating the config I believe):
echo "options vfio-pci ids=10de:2204,10de:1aef disable_vga=1"> /etc/modprobe.d/vfio.conf
Double the Games
For a fun test I am going to try and spin two Windows 11 VMs up, one per GPU, and play two games at once to see if I blow a fuse.
Windows VMs were set up no problem. Goal is to try and pass one Bluetooth and connect to the TV and the other KB&M and connect to my gross monitor.
Also, I’ve only played offline stuff in my GPU tests prior but it would be fun to play something online with another person. Running on a VM seems to run some risks, unfortuantly this guide shows how I f’d that up in creating the VMs with settings that added Qemu guest agent / virtio drivers.
Getting into windows with the GPU worked right off the bat. Going for the new NVidia app but windows update installed drivers that work fine.
Next was to re-name the PC and enable RDP so I could get in without a physical monitor.
Then Steam to see what this half of the server could do. Not sure what onlines games that are taxing are out there for VMs… Can always use 3DMark.
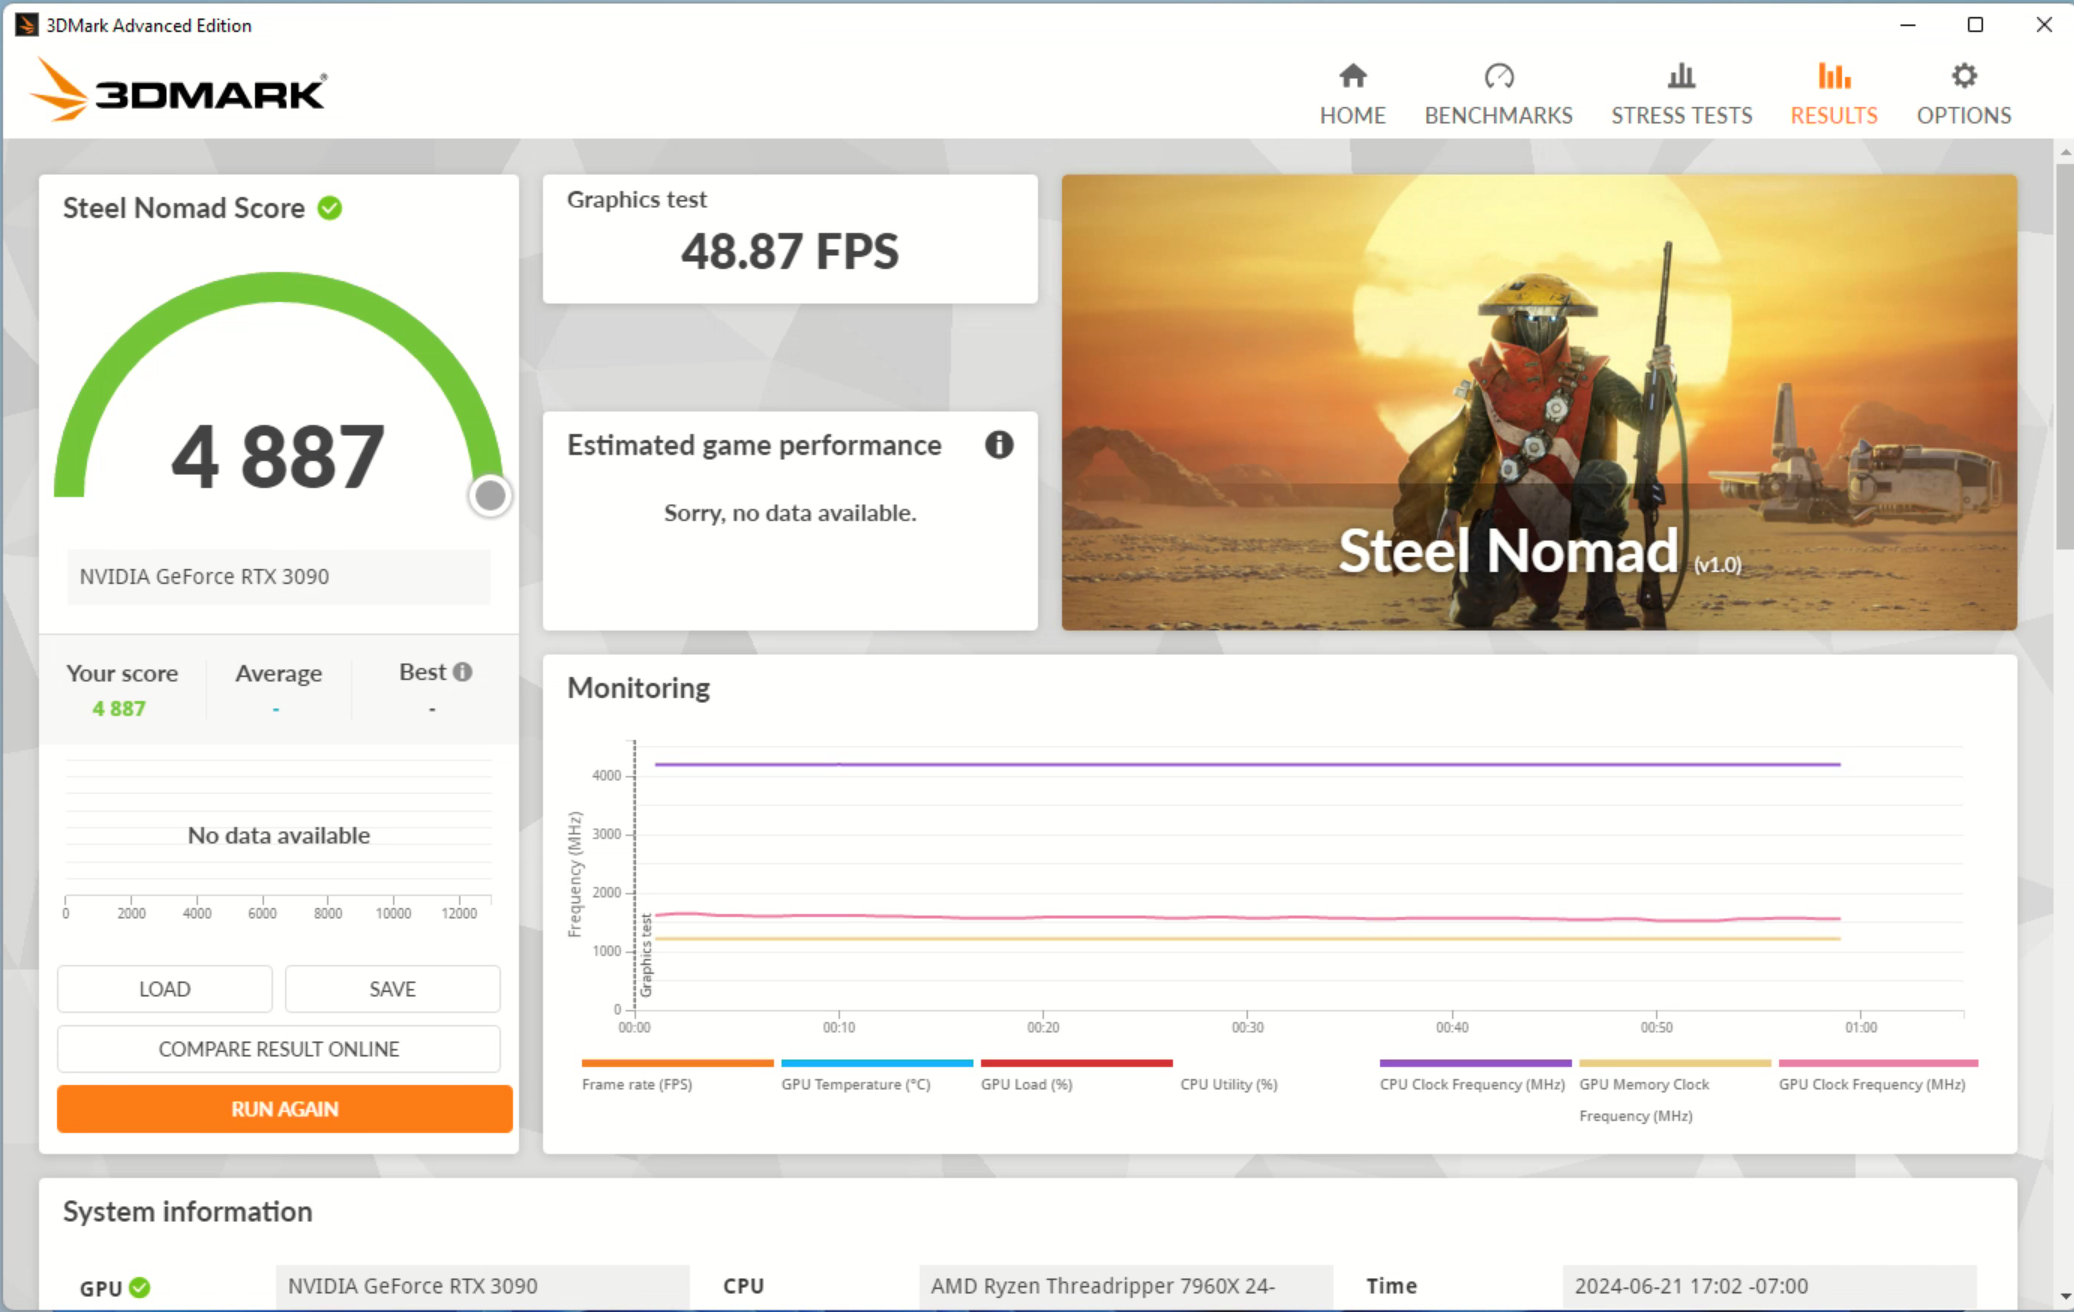
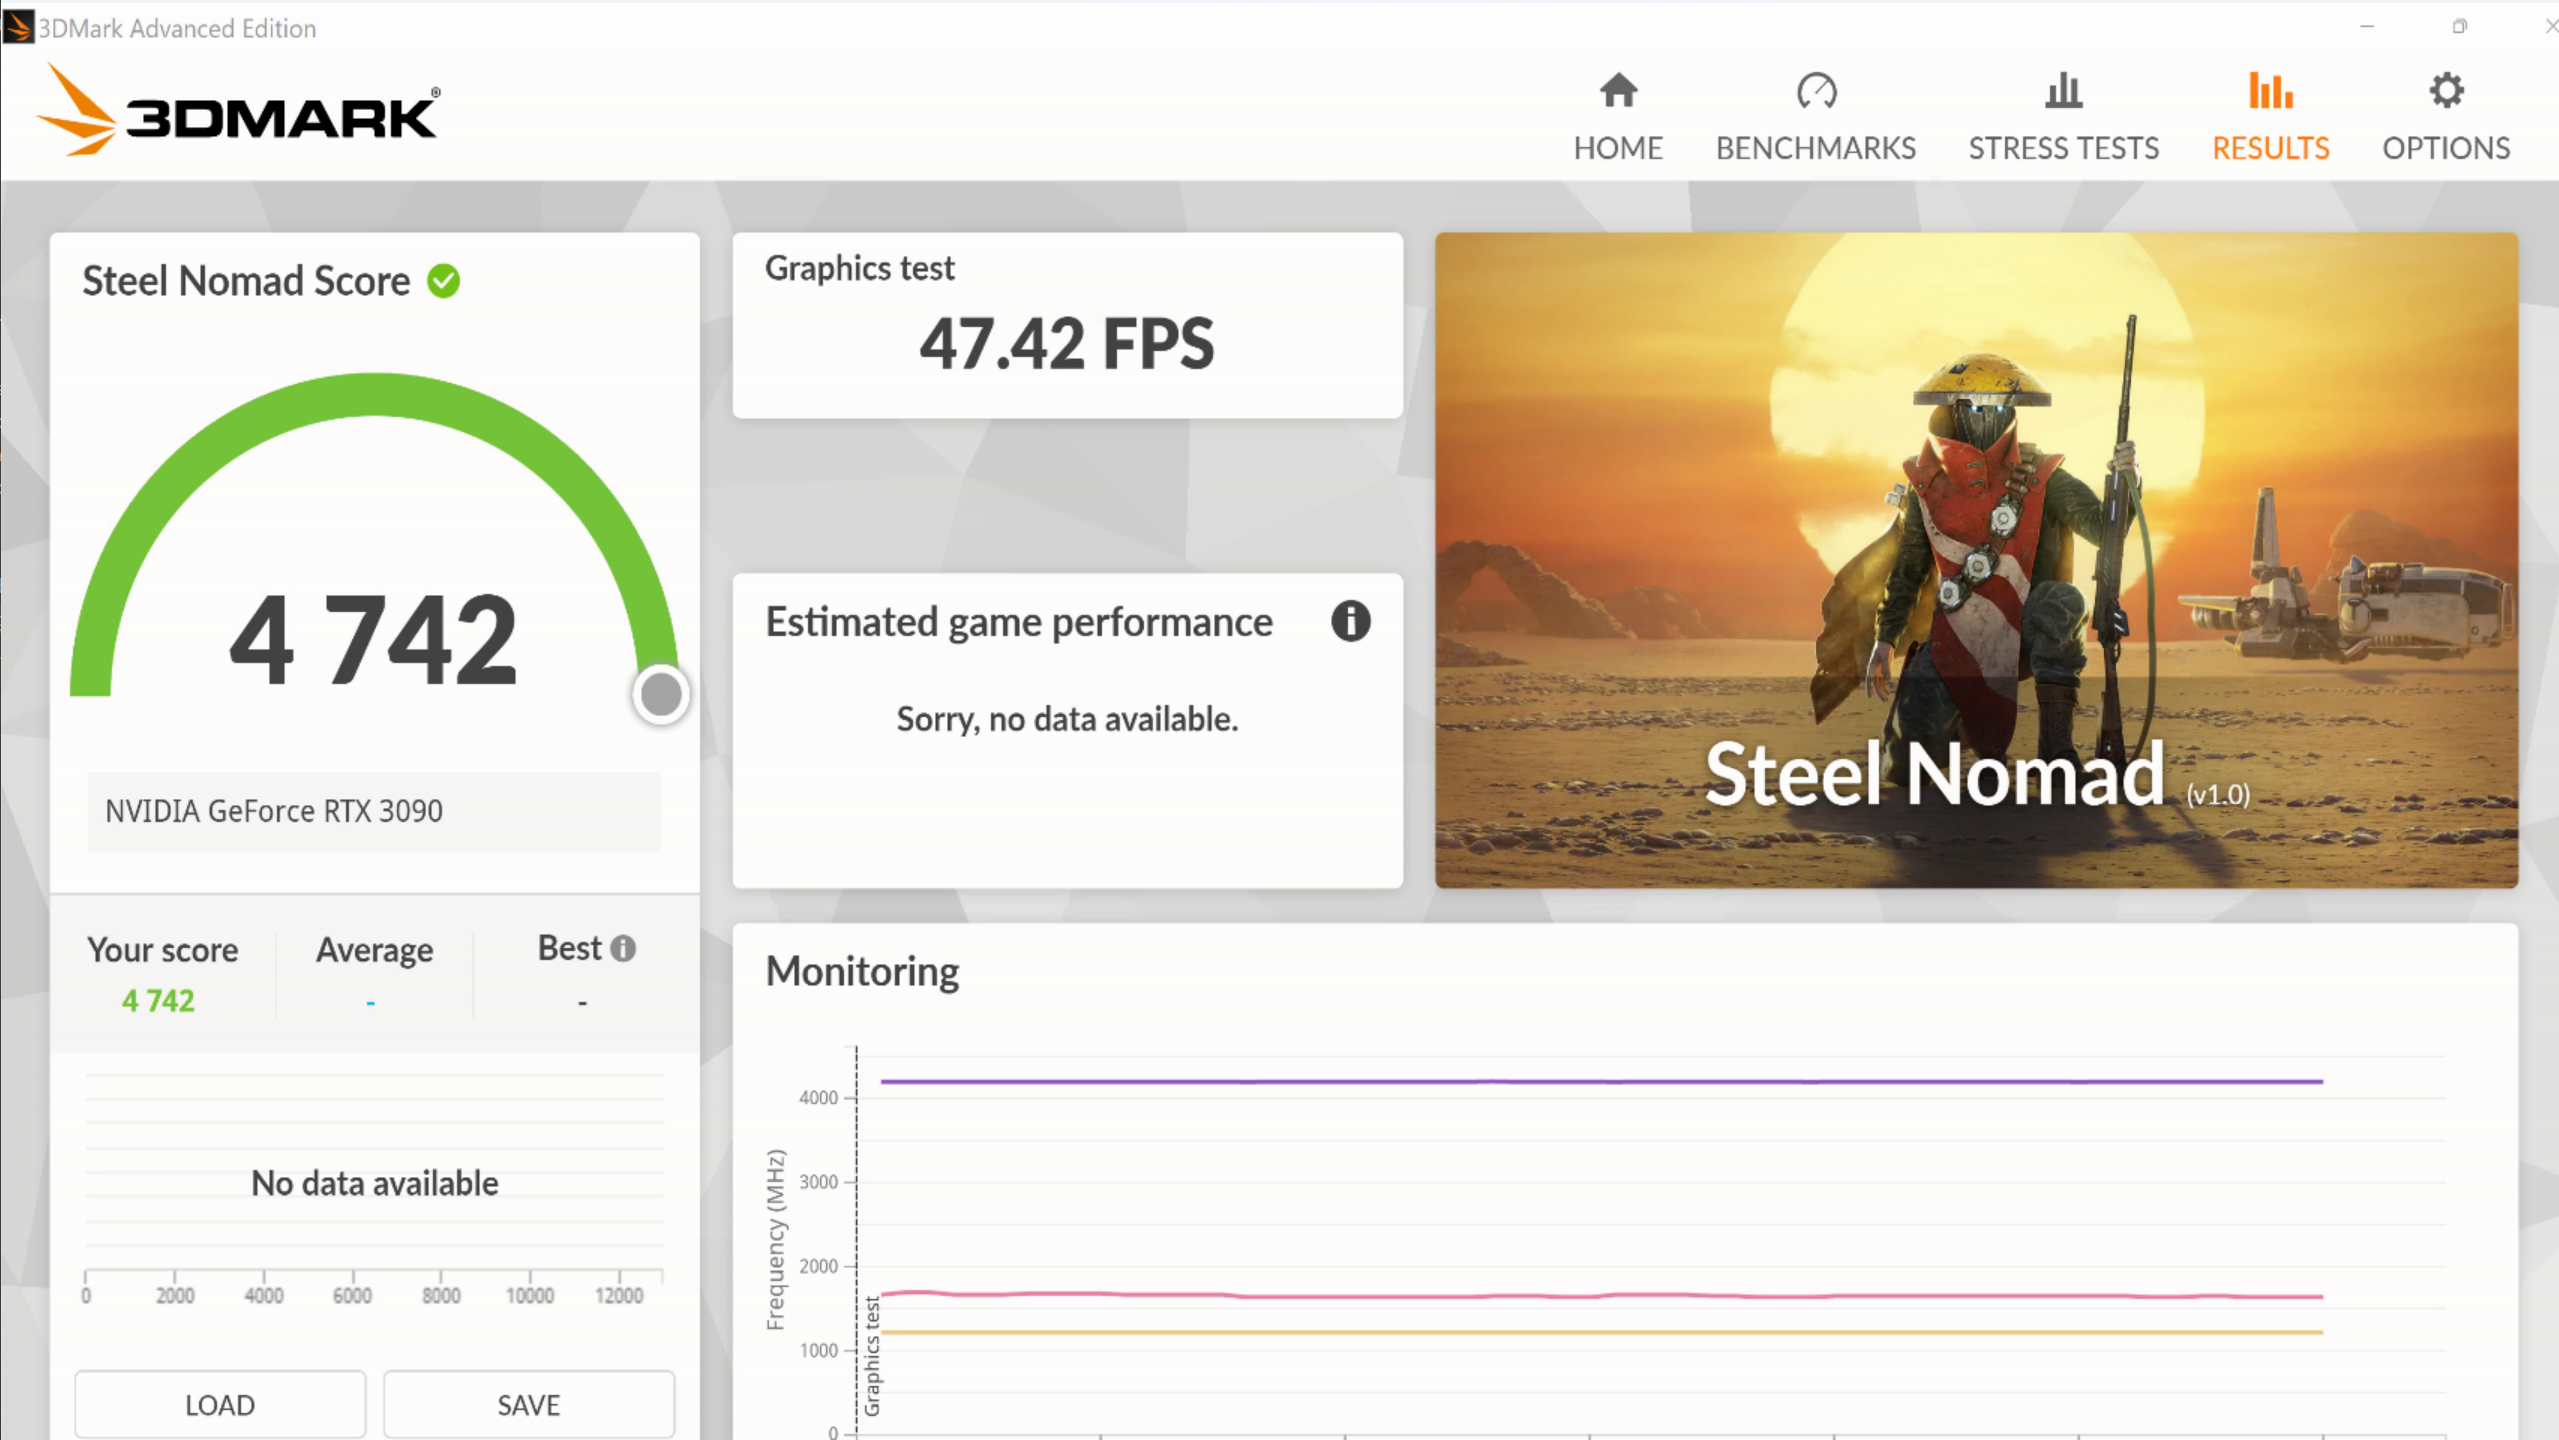
Steel Nomad
The first test that popped up was called steel nomad. I deciced to try it on each GPU and then both at once.
Side 1:
Side 2:
Then I realized I’d need two steam accounts to play the same game twice! Going to move on to Epic where I have two accounts.
Bluetooth
Passing the on board bluetooth in wasn’t trivial. For some reaon once I passed in the Wireless stuff I couldn’t remote in so I removed the GPU while I set things up.
- Pass a USB wireless device
- Pass a PCI wireless device
- Boot and see none of them work
- Install drivers from mobo website and celebrate
GTAV
TODO Picture
Worked Great
EasyAntiCheat
This guy got it working here.
This guy has about the same advice on reddit here
ADD: args: -cpu host,-hypervisor,kvm=off

FROM: net0: virtio=BC:24:11:A7:76:EF,bridge=vmbr0,firewall=1
TO: net0: e1000=BC:24:11:65:53:AA,bridge=vmbr0,firewall=1

Then FAKE Intel with prefix 00:AA:02 using [online generator](https://dnschecker.org/mac-address-generator.php)
Generated as: 00:AA:02:A6:AB:FC and replacing what is above
LSI is tricky, you can’t just do this:
FROM: scsihw: virtio-scsi-single
TO: scsihw: lsi
You need to detatch the disk and then readd it as a SATA drive before lsi will boot.
FROM: scsi0: local-zfs:vm-119-disk-1,iothread=1,size=512G
TO: sata0: local-zfs:vm-119-disk-1,cache=writeback,size=512G
Then it says to fill in the bios info. I just made it all match the output of dmidecode --type 1
System Information
        Manufacturer: To Be Filled By O.E.M.
        Product Name: TRX50 WS
        Version: To Be Filled By O.E.M.
        Serial Number: To Be Filled By O.E.M.
        UUID: 51006b9c-5242-0000-0000-000000000000
        Wake-up Type: Power Switch
        SKU Number: To Be Filled By O.E.M.
        Family: To Be Filled By O.E.M.
Already out of disk space
GTAV was huge so I needed to double my diskspace. Getting the space into C:\ required some fanagling.
Resize the partition via disk manager after doing it in proxmox. This requires deleting the recovery partition since it was in the middle.
diskpart
list disk
select disk <number>
list partition
select partition <number>
delete partition override
bingo bango that worked
Fortnite Take Two
In a last ditch attempt I took all I applied and reimaged the VMs w/ a fresh copy of windows. Fortnite is the only game my son will play with me so it was the best chance at giving a tech demo with the two gaming VMs before moving on to the LLM which will steal the GPUs away.
While installing Fortnite I noticed some decent write speeds:

And it worked! At least I got into the game, but before I play I want a second controller.
USB Trouble
One of the USB ports is acting weird and I only have three. I’m going to see if it’s a power saving thing like described here but if not I can always connect the front USB port up to the motherboard and try it.
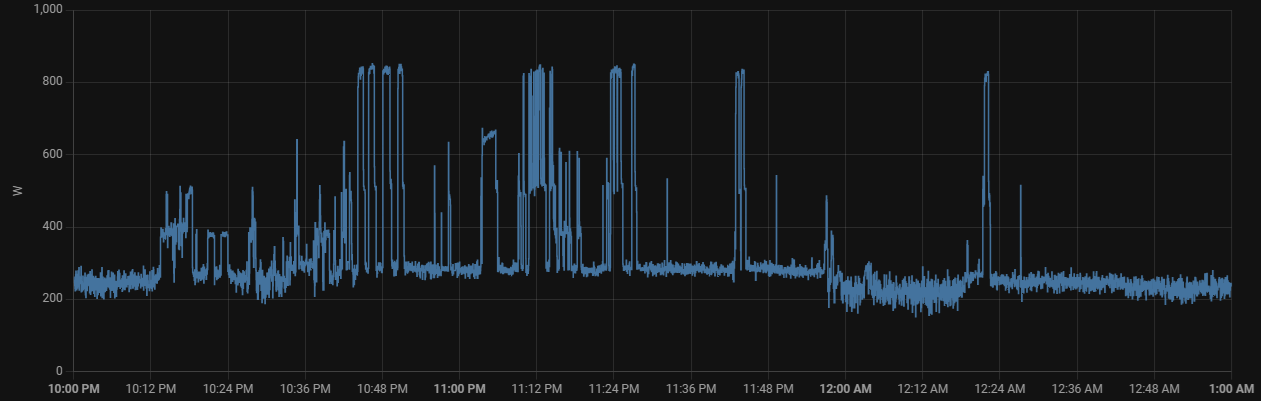
AI Time
I’ve documented the initial setup and usage for the LLMs over at Pop!_OS. You can see that when prompting a 70B LLM this build is a powerhungry beast:
NAS
Proxmox can handle ZFS right out of the box but people also like to pass disks into a TrueNAS VM. However, this isn’t ideal and people recommend passing entire LSI HBAs into TrueNAS - this method passes QEMU devices.
Another good option is to use OpenMediaVault or Cockpit to manage ZFS on Proxmox from an LXC. I will likely go this route.
The web says you need to configure the BIOS for Slim SAS to use SATA over PCIE
Fair warning here too:
When you do PCIe passthrough, the whole IOMMU group gets passed through, since your HBA seems to be in group 0 along with a bunch of probably chipset stuff, the whole chipset gets passed through to the VM.

Enabling ACS will put each device in its own group so you can passthrough it individually, hopefully there's a setting in your BIOS, but if not you can put pcie_acs_override=downstream,multifunction in your GRUB CMDLINE.
TODO what are these helper scripts
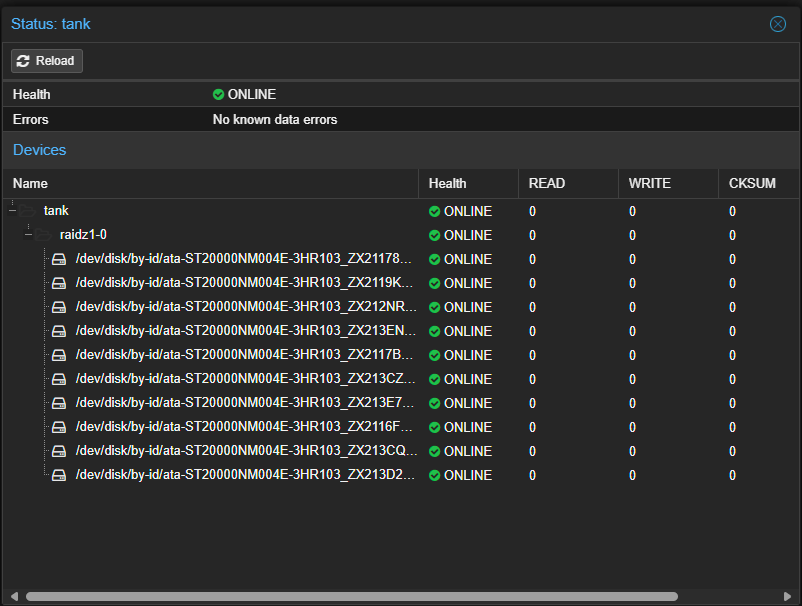
Creating The Pool
Creating the pool was very easy. From the proxmox UI just click on the node -> Disks -> ZFS -> Create ZFS and fill out the form. I selected lz4 as TrueNAS recommends it and went with RAIDZ for single disk fault tolerance. RAIDZ2 for two disk tolerance was tempting but I don’t ever plan to expand this past 10 disks. After I had this:
Mapping
Now we need a way to map it into the LXC that will manage shares.
Create Dataset
I am going to name my dataset data_root:
zfs create tank/data_root
Map to a user on host
NOTE This went bad for me due to id ranges.
root@HaynesIntelligence:~/workspace# cat /etc/subuid
root:100000:65536

root@HaynesIntelligence:~/workspace# cat /etc/subgid
root:100000:65536
Both of what was in the guide are out of the range and I don’t get what this shit really means.
Now a user - first on the host:
groupadd -g 110000 nas_shares

useradd nas -u 101000 -g 110000 -m -s /bin/bash

chown -R nas:nas_shares /tank/data_root/
Check:
root@HaynesIntelligence:/tank# ls -l
total 1
drwxr-xr-x 2 nas nas_shares 2 Jun 26 08:36 data_root
It didn’t like the uid:
root@HaynesIntelligence:~# useradd nas -u 101000 -g 110000 -m -s /bin/bash
useradd warning: nas's uid 101000 outside of the UID_MIN 1000 and UID_MAX 60000 range.
DO NOT clean out
nano /etc/subuidby deletingroot:100000:65536. Just let it ride
root@HaynesIntelligence:~# cat /etc/passwd
nas:x:101000:110000::/home/nas:/bin/bash
Creating & Configuring LXC
Screw Up
Using the helper script I hit an error that is almost certainly caused by the things I did for the new user on the datapool. This command won’t let me create an LXC:
lxc-usernsexec -m u:0:100000:65536 -m g:0:100000:65536 – tar xpf - –zstd –totals –one-file-system -p –sparse –numeric-owner –acls –xattrs ‘–xattrs-include=user.’ ‘–xattrs-include=security.capability’ ‘–warning=no-file-ignored’ ‘–warning=no-xattr-write’ -C /var/lib/lxc/121/rootfs –skip-old-files –anchored –exclude ‘./dev/’
bash: line 182: exit: A problem occured while trying to create container.: numeric argument required
Maybe the user, going to userdel -r nas.
But on further inspection I see it’s the new group:
extracting archive '/mnt/pve/ISO-Templates/template/cache/debian-12-standard_12.2-1_amd64.tar.zst'
lxc 20240626132532.726 ERROR    idmap_utils - ../src/lxc/idmap_utils.c:lxc_map_ids:245 - newuidmap failed to write mapping "newuidmap: uid range [0-65536) -> [100000-165536) not allowed": newuidmap 8410 0 100000 65536
Failed to write id mapping for child process
lxc 20240626132532.726 ERROR    utils - ../src/lxc/utils.c:lxc_drop_groups:1570 - Operation not permitted - Failed to drop supplimentary groups
lxc 20240626132532.726 ERROR    utils - ../src/lxc/utils.c:lxc_switch_uid_gid:1545 - Invalid argument - Failed to switch to gid 0

TASK ERROR: unable to create CT 121 - command 'lxc-usernsexec -m u:0:100000:65536 -m g:0:100000:65536 -- tar xpf - --zstd --totals --one-file-system -p --sparse --numeric-owner --acls --xattrs '--xattrs-include=user.*' '--xattrs-include=security.capability' '--warning=no-file-ignored' '--warning=no-xattr-write' -C /var/lib/lxc/121/rootfs --skip-old-files --anchored --exclude './dev/*'' failed: exit code 1
Remove and verify:
groupdel -f nas_shares
cat /etc/group
Final thing is checking out cleaning up the owner of the dataset:
root@HaynesIntelligence:/tank# ls -l
total 1
drwxr-xr-x 2 root root 2 Jun 26 08:36 data_root
Got it back to root with chown root:root /tank/data_root/. However I think I messed up the subuid fix by adding a subid file:
root@HaynesIntelligence:/etc# cat subid
root:100000:65536
And that was it! Deleting that line screwed me!
LXC After Fix
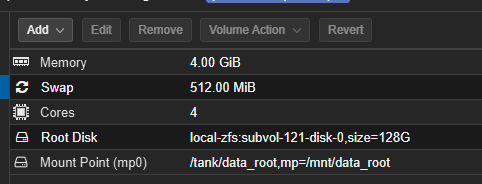
Once fixed the helper script worked flawlessly. I configured:
- 128G disk
- 4 cores
- 4096 RAM
Next is to add the share to the LXC:
groupadd -g 10000 nas_shares
useradd nasusr -u 1000 -g 10000 -m -s /bin/bash
Verify:
root@nas01:~# cat /etc/passwd | grep nasusr
nasusr:x:1000:10000::/home/nasusr:/bin/bash
Now shut down to mount the dataset
Finishing Touches
On the host shell run this for your LXC’s ID:
pct set 121 -mp0 /tank/data_root,mp=/mnt/data_root
The UI has a way to do this to but you can verify the command worked via node -> Resources
And rebooting we can see the pool is mounted!
root@nas01:/mnt# ls
data_root
SMB Shares With Cockpit
For Cockpit we will continue to follow this guide.
apt update && apt dist-upgrade -y

# Install Cockpit
apt install cockpit --no-install-recommends

# Install the necessary extensions (check for new versions, if you like)
wget https://github.com/45Drives/cockpit-file-sharing/releases/download/v3.3.7/cockpit-file-sharing_3.3.7-1focal_all.deb
wget https://github.com/45Drives/cockpit-navigator/releases/download/v0.5.10/cockpit-navigator_0.5.10-1focal_all.deb
wget https://github.com/45Drives/cockpit-identities/releases/download/v0.1.12/cockpit-identities_0.1.12-1focal_all.deb

# Install them
apt install ./*.deb -y

# Cleanup the installers
rm *.deb
I updated the file-shareing plugin version but the rest were the latest already. The install threw some warnings but I let it ride since last time trying to fix things was worst.
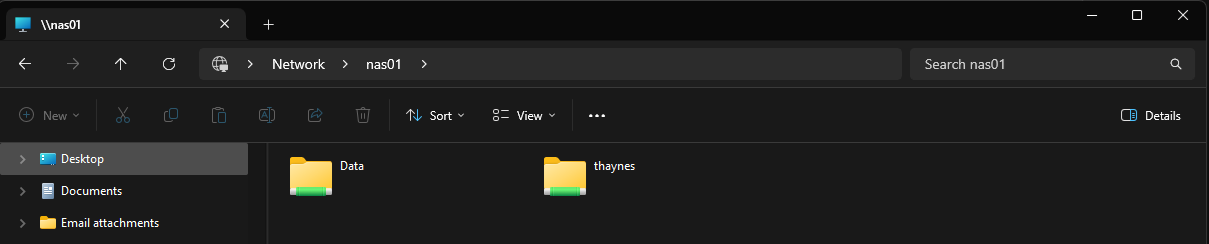
Fortunatly no suprised were left. Once I logged into the nice web UI via https://nas01.example:9090/ I was able to create users and shares as the guide suggested. Only thing not in the guide was giving users permission to write vs. just the shares owner. Once I did that I was able to copy an ISO into it super fast.
NFS
Following this guide where I am just configuring it right on proxmox and skip all the hooplah.
Need to install NFS Server:
sudo apt install nfs-kernel-server
sudo systemctl enable --now nfs-server
First find dirs to expose:
root@HaynesIntelligence:/tank# ls
data_root  k8s_root
Make sure the premissions are right - this always gets fucked up:
sudo chmod 755 /tank/data_root
sudo chmod 755 /tank/k8s_root
root@HaynesIntelligence:/tank# id -u nas 101000 root@HaynesIntelligence:/tank# getent group nas_shares nas_shares:x:110000: root@HaynesIntelligence:/tank#
Then edit /etc/exports:
root@HaynesIntelligence:/tank/k8s_root# sudo nano /etc/exports
# /etc/exports: the access control list for filesystems which may be exported
#               to NFS clients.  See exports(5).
#
# Example for NFSv2 and NFSv3:
# /srv/homes       hostname1(rw,sync,no_subtree_check) hostname2(ro,sync,no_subtree_check)
#
# Example for NFSv4:
# /srv/nfs4        gss/krb5i(rw,sync,fsid=0,crossmnt,no_subtree_check)
# /srv/nfs4/homes  gss/krb5i(rw,sync,no_subtree_check)
#
/tank/data_root     192.168.40.0/24(rw,sync,no_subtree_check,no_root_squash) # TODO for testing I used no_root_squash but I will work out permissions
/tank/k8s_root      192.168.40.0/24(rw,sync,no_subtree_check,no_root_squash)
Load it with sudo exportfs -arv. Now onto a test to mount it.
May need to install nfs-common (proxmox seemed to have it though):
sudo apt install nfs-common
Make mount points:
root@pve04:~# cd /mnt
root@pve04:/mnt# mkdir tank-data
root@pve04:/mnt# mkdir tank-k8s
Now edit /etc/fstab:
# <file system> <mount point> <type> <options> <dump> <pass>
/dev/pve/root / ext4 errors=remount-ro 0 1
UUID=9FBD-64E7 /boot/efi vfat defaults 0 1
/dev/pve/swap none swap sw 0 0
proc /proc proc defaults 0 0

# NFS added below this line
HaynesIntelligence.haynesnetwork:/tank/data_root /mnt/tank-data nfs4 defaults,user,exec 0 0
HaynesIntelligence.haynesnetwork:/tank/k8s_root /mnt/tank-k8s nfs4 defaults,user,exec 0 0
Now reload fstab using sudo mount -a. CD into each to verify permissions which may take some sorting:
root@pve04:/mnt/tank-data# ls
Backups  Downloads  Incoming  LibGenMirror  LLM  Temp  Torrents

root@pve04:/mnt/tank-k8s# ls
data