GPU Passthrough w/ Intel Iris Xe
iGPU Passthrough Attempt
Part 1 - the wrong path
In order to do this I thought I had to embark on these steps to pass through my iGPU.
However, those steps blew…
WARNING: I could not reboot later down the road and it got stuck on
Loading initial Ramdiskevery time. I booted to safemode and rolled back toGRUB_CMDLINE_LINUX_DEFAULT="quiet"and it worked. This is strange because I was able to reboot in the coming lines.
After the rolling back all I was left with a bit to sort out but these modules were installed so I didn’t have to do that again:
nano /etc/modules

vfio
vfio_pci
vfio_virqfd
vfio_iommu_type1

update-initramfs -u -k all
reboot
Part 2 - a better path
Now an interlude to follow these steps instead. That of course immediately told me to first follow this guide.
Blind Faith w/ Commands
It gets hardcore fast with a kernal upgrade so I migrated my Ventura VM off the box incase shit goes to shit. Though I could just restore the backup.
apt update
apt install proxmox-headers-6.5.13-3-pve
apt install proxmox-kernel-6.5.13-3-pve-signed
proxmox-boot-tool kernel pin 6.5.13-3-pve
proxmox-boot-tool refresh
reboot
And holy fuck, it changed the network interfaces again. This time np# went away. asdas
Now time for more voodoo:
apt update && apt install git sysfsutils pve-headers mokutil -y
rm -rf /var/lib/dkms/i915-sriov-dkms*
rm -rf /usr/src/i915-sriov-dkms*
rm -rf ~/i915-sriov-dkms
KERNEL=$(uname -r); KERNEL=${KERNEL%-pve}
More fucking voodoo:
cd ~
git clone https://github.com/strongtz/i915-sriov-dkms.git
cd ~/i915-sriov-dkms
cp -a ~/i915-sriov-dkms/dkms.conf{,.bak}
sed -i 's/"@_PKGBASE@"/"i915-sriov-dkms"/g' ~/i915-sriov-dkms/dkms.conf
sed -i 's/"@PKGVER@"/"'"$KERNEL"'"/g' ~/i915-sriov-dkms/dkms.conf
sed -i 's/ -j$(nproc)//g' ~/i915-sriov-dkms/dkms.conf
cat ~/i915-sriov-dkms/dkms.conf
The last command spit out:
PACKAGE_NAME="i915-sriov-dkms"
PACKAGE_VERSION="6.5.13-3"
Which the guide says is good. At this point I guess we keep just inputting crazy voodoo:
apt install --reinstall dkms -y
dkms add .
cd /usr/src/i915-sriov-dkms-$KERNEL
dkms status
Then last line checks to see if it’s all good:
root@pve04:/usr/src/i915-sriov-dkms-6.5.13-3# dkms status
i915-sriov-dkms/6.5.13-3: added
More voodoo, this is getting out of control:
dkms install -m i915-sriov-dkms -v $KERNEL -k $(uname -r) --force -j 1
dkms status
Them more checks to see if the voodoo worked:
root@pve04:/usr/src/i915-sriov-dkms-6.5.13-3# dkms status
i915-sriov-dkms/6.5.13-3, 6.5.13-3-pve, x86_64: installed
Then some way to bypass secure boot:
mokutil --import /var/lib/dkms/mok.pub
Don’t mess up the password! Then it’s time to upgrade GRUB again so ignore the massive shit I posted above the interlude:
cp -a /etc/default/grub{,.bak}
sudo sed -i '/^GRUB_CMDLINE_LINUX_DEFAULT/c\GRUB_CMDLINE_LINUX_DEFAULT="quiet intel_iommu=on iommu=pt i915.enable_guc=3 i915.max_vfs=7"' /etc/default/grub
update-grub
update-initramfs -u -k all
apt install sysfsutils -y
Now that that is top notch we need this intel:
root@pve04:/usr/src/i915-sriov-dkms-6.5.13-3# lspci | grep VGA
00:02.0 VGA compatible controller: Intel Corporation Raptor Lake-P [Iris Xe Graphics] (rev 04)
Fortunately mine matches the guide:
echo "devices/pci0000:00/0000:00:02.0/sriov_numvfs = 7" > /etc/sysfs.conf
And to verify the change:
cat /etc/sysfs.conf
devices/pci0000:00/0000:00:02.0/sriov_numvfs = 7
Into the Basement
Now it’s time for a reboot but one that requires a monitor and KB&M attached to the host to set up something called MOK!
For menu options I selected Enroll MOK -> Continue -> Yes -> Reboot
Reboot Broke It!
Then my damn network interfaces changed their names again! But editing /etc/network/interfaces and a ifreload -a got that sorted.
Which was because after doing that MOK thing it booted back to the latest kernal - as seen here in the grub menu options:
root@pve04:/boot/grub# grep menu grub.cfg
if [ x"${feature_menuentry_id}" = xy ]; then
  menuentry_id_option="--id"
  menuentry_id_option=""
export menuentry_id_option
    set timeout_style=menu
set menu_color_normal=cyan/blue
set menu_color_highlight=white/blue
menuentry 'Proxmox VE GNU/Linux' --class proxmox --class gnu-linux --class gnu --class os $menuentry_id_option 'gnulinux-simple-8b2eb4ef-3076-4676-9210-df8d2ae81f5e' {
submenu 'Advanced options for Proxmox VE GNU/Linux' $menuentry_id_option 'gnulinux-advanced-8b2eb4ef-3076-4676-9210-df8d2ae81f5e' {
        menuentry 'Proxmox VE GNU/Linux, with Linux 6.8.4-3-pve' --class proxmox --class gnu-linux --class gnu --class os $menuentry_id_option 'gnulinux-6.8.4-3-pve-advanced-8b2eb4ef-3076-4676-9210-df8d2ae81f5e' {
        menuentry 'Proxmox VE GNU/Linux, with Linux 6.8.4-3-pve (recovery mode)' --class proxmox --class gnu-linux --class gnu --class os $menuentry_id_option 'gnulinux-6.8.4-3-pve-recovery-8b2eb4ef-3076-4676-9210-df8d2ae81f5e' {
        menuentry 'Proxmox VE GNU/Linux, with Linux 6.8.4-2-pve' --class proxmox --class gnu-linux --class gnu --class os $menuentry_id_option 'gnulinux-6.8.4-2-pve-advanced-8b2eb4ef-3076-4676-9210-df8d2ae81f5e' {
        menuentry 'Proxmox VE GNU/Linux, with Linux 6.8.4-2-pve (recovery mode)' --class proxmox --class gnu-linux --class gnu --class os $menuentry_id_option 'gnulinux-6.8.4-2-pve-recovery-8b2eb4ef-3076-4676-9210-df8d2ae81f5e' {
        menuentry 'Proxmox VE GNU/Linux, with Linux 6.5.13-3-pve' --class proxmox --class gnu-linux --class gnu --class os $menuentry_id_option 'gnulinux-6.5.13-3-pve-advanced-8b2eb4ef-3076-4676-9210-df8d2ae81f5e' {
        menuentry 'Proxmox VE GNU/Linux, with Linux 6.5.13-3-pve (recovery mode)' --class proxmox --class gnu-linux --class gnu --class os $menuentry_id_option 'gnulinux-6.5.13-3-pve-recovery-8b2eb4ef-3076-4676-9210-df8d2ae81f5e' {
menuentry "Memory test (memtest86+x64.efi)" {
menuentry 'Memory test (memtest86+x64.efi, serial console)' {
menuentry 'UEFI Firmware Settings' $menuentry_id_option 'uefi-firmware' {
# This file provides an easy way to add custom menu entries.  Simply type the
# menu entries you want to add after this comment.  Be careful not to change
So I need to set the default to gnulinux-6.5.13-3-pve-advanced-8b2eb4ef-3076-4676-9210-df8d2ae81f5e.
nano /etc/default/grub
Change
GRUB_DEFAULT=0
TO
GRUB_DEFAULT="gnulinux-advanced-8b2eb4ef-3076-4676-9210-df8d2ae81f5e>gnulinux-6.5.13-3-pve-advanced-8b2eb4ef-3076-4676-9210-df8d2ae81f5e"
update-grub
Reboot Fixed It!
And in the right kernal we see the correct output from the final exam!
root@pve04:~# lspci | grep VGA
00:02.0 VGA compatible controller: Intel Corporation Raptor Lake-P [Iris Xe Graphics] (rev 04)
00:02.1 VGA compatible controller: Intel Corporation Raptor Lake-P [Iris Xe Graphics] (rev 04)
00:02.2 VGA compatible controller: Intel Corporation Raptor Lake-P [Iris Xe Graphics] (rev 04)
00:02.3 VGA compatible controller: Intel Corporation Raptor Lake-P [Iris Xe Graphics] (rev 04)
00:02.4 VGA compatible controller: Intel Corporation Raptor Lake-P [Iris Xe Graphics] (rev 04)
00:02.5 VGA compatible controller: Intel Corporation Raptor Lake-P [Iris Xe Graphics] (rev 04)
00:02.6 VGA compatible controller: Intel Corporation Raptor Lake-P [Iris Xe Graphics] (rev 04)
00:02.7 VGA compatible controller: Intel Corporation Raptor Lake-P [Iris Xe Graphics] (rev 04)
root@pve04:~#
root@pve04:~# dmesg | grep i915 | grep Enabled
[    4.346190] i915 0000:00:02.0: Enabled 7 VFs
root@pve04:~# dmesg | grep i915 | grep minor
[    3.779609] [drm] Initialized i915 1.6.0 20201103 for 0000:00:02.0 on minor 0
[    4.323515] [drm] Initialized i915 1.6.0 20201103 for 0000:00:02.1 on minor 1
[    4.328156] [drm] Initialized i915 1.6.0 20201103 for 0000:00:02.2 on minor 2
[    4.332771] [drm] Initialized i915 1.6.0 20201103 for 0000:00:02.3 on minor 3
[    4.335769] [drm] Initialized i915 1.6.0 20201103 for 0000:00:02.4 on minor 4
[    4.339356] [drm] Initialized i915 1.6.0 20201103 for 0000:00:02.5 on minor 5
[    4.342823] [drm] Initialized i915 1.6.0 20201103 for 0000:00:02.6 on minor 6
[    4.346097] [drm] Initialized i915 1.6.0 20201103 for 0000:00:02.7 on minor 7
Now I’m flush with GPUs!
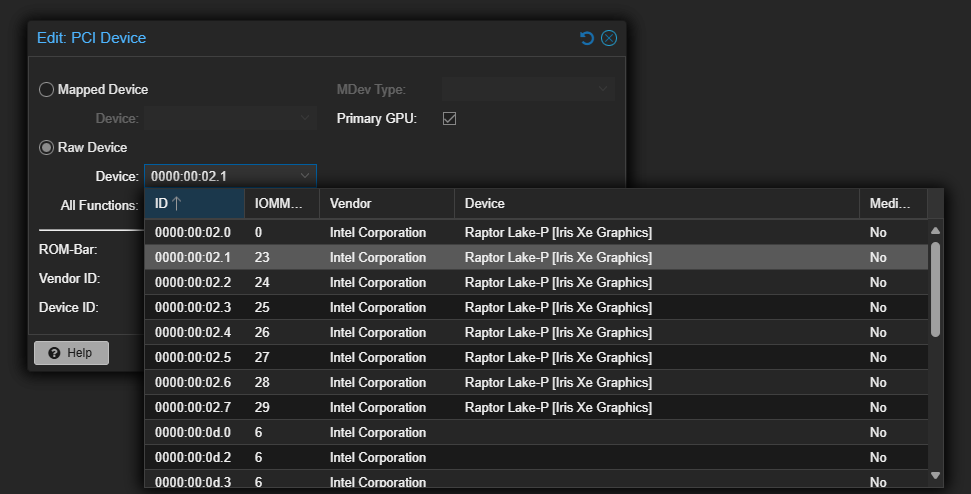
Next to configure the Window 11 VM to one of the new ones. I selected the first and ticked Primary GPU:

Immediately didn’t work:
TASK ERROR: no pci device info for device '0000:00:02.1'
Un-ticking “All functions” fixed it, this was in the guide I just don’t read.
Still error 43 though, maybe something I need to unwind from earlier trial and error.
nano /etc/pve/qemu-server/114.conf
DELETE args: -cpu 'host,+kvm_pv_unhalt,+kvm_pv_eoi,hv_vendor_id=NV43FIX,kvm=off'
CHANGE cpu: host,hidden=1,flags=+pcid to cpu=host
Checking PCI Device it’s clear the 7 are gone! Going to remove that and reboot to see if they comeback and if I can map it as a device.
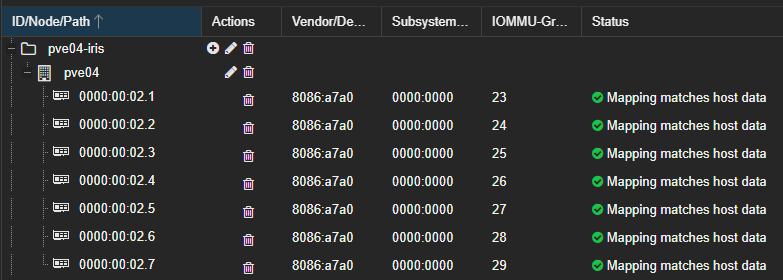
Rebooting brought them back. I went with the Datacenter -> Recourse Mappings method mentioned here instead of the direct device:

That complained:
TASK ERROR: connection timed out
iGPU Detected!
Switching back to the device (vs. the mapping) got me a win with a caveat:
No error 43!

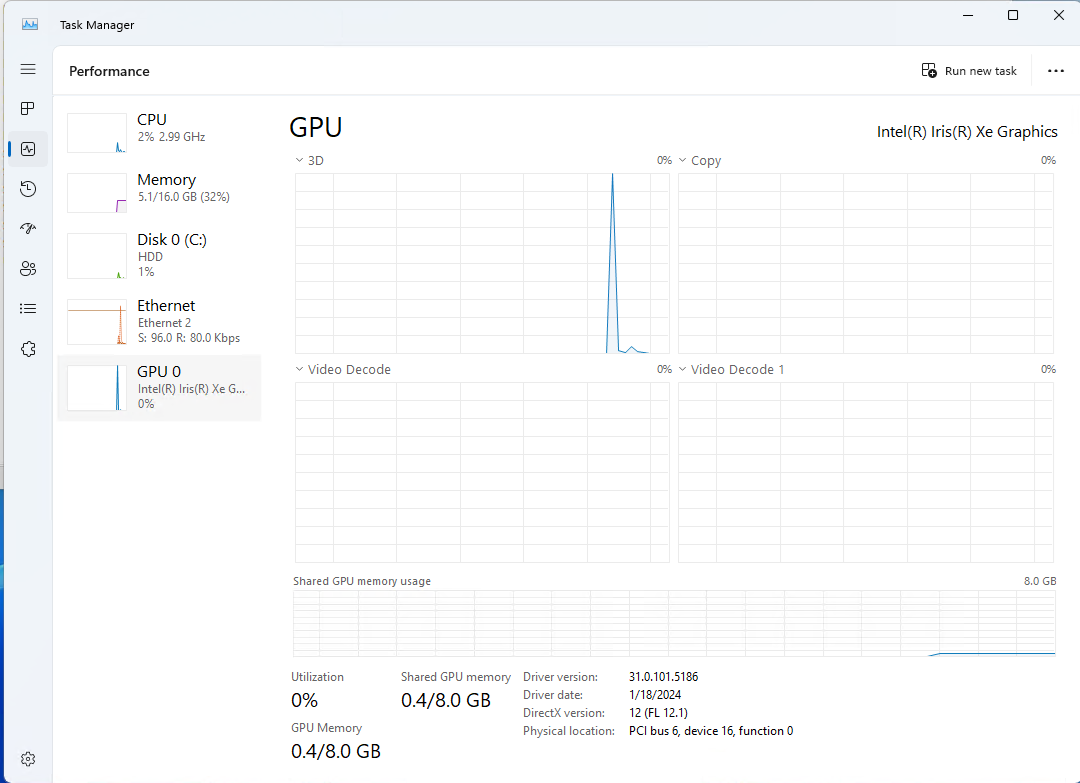
It’s in task manager!

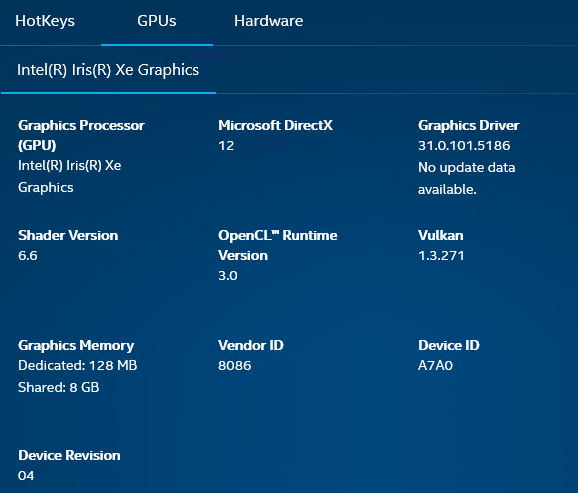
And Intel Graphics Command Center!!!

The caveat being nomachine and Parsec stopped working 100%. RDP got the job done but it’s doing it’s own thing.
I decided to try the mapping again but this time read what the other guy did a bit more carefully and mapped all 7:

Once I manually installed the intel drivers for the iGPU I was able to get nomachine and parsec to work again sas the window’s popping up which wasn’t great.
Gaming
My benchmark game Hades was certainly playable but I couldn’t get Game Bar to display the fps. RDP scaled well with the monitor too…

After manually installing the intel drivers Parsec of course worked but Hades just crashed on startup.
Remarks
Hopefully I end up needing the iGPU for something down the road, certainly won’t be great for gaming but this guy on reddit also wrote a great guide that if I found earlier would have saved me some trouble!
Next Challenges
- Play around with
Datacenter->Resource Mappingsto see if I can use one in an HA LXC or VM so it’ll just migrate to an equivalent vGPU. - iGPU for Ubuntu see if it helps Waydroid…